How To Build An 8’ Classic Table For Outdoors
/For over a year, our backyard has sat without a dining table. Bare. Naked. Sad. I finally decided to change that with this budget friendly DIY outdoor dining table for only $230.
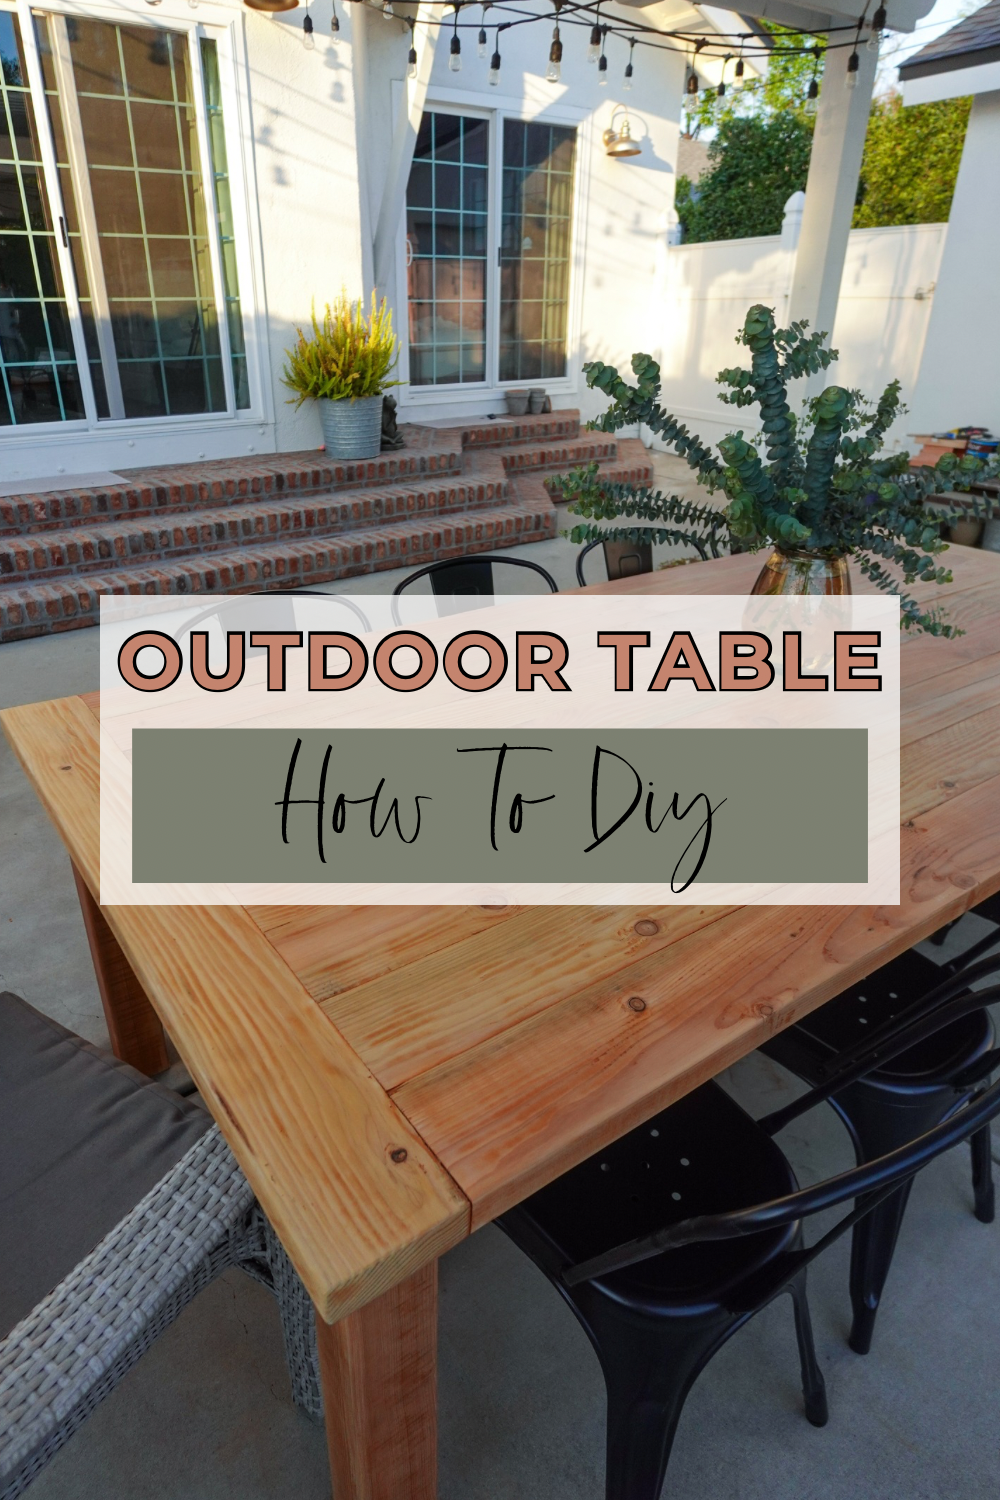
Here is how to build your own custom classic 8’ outdoor dining table to enjoy for years to come!
Materials & Tools
2” x 6” x 8’ Douglas Fir Boards for the tops (10)
4” x 4” x 8’ Douglas Fir for the legs (2)
2” x 4” x 8’ Douglas Fir Boards for the aprons + supports (5)
Sandpaper - I used 80, 120, 150 and 220 grit
Clamps
*These links contain affiliate links. Meaning if you purchase through my link, while it’s the same cost to you, I get a small commission – see my full disclosure here*

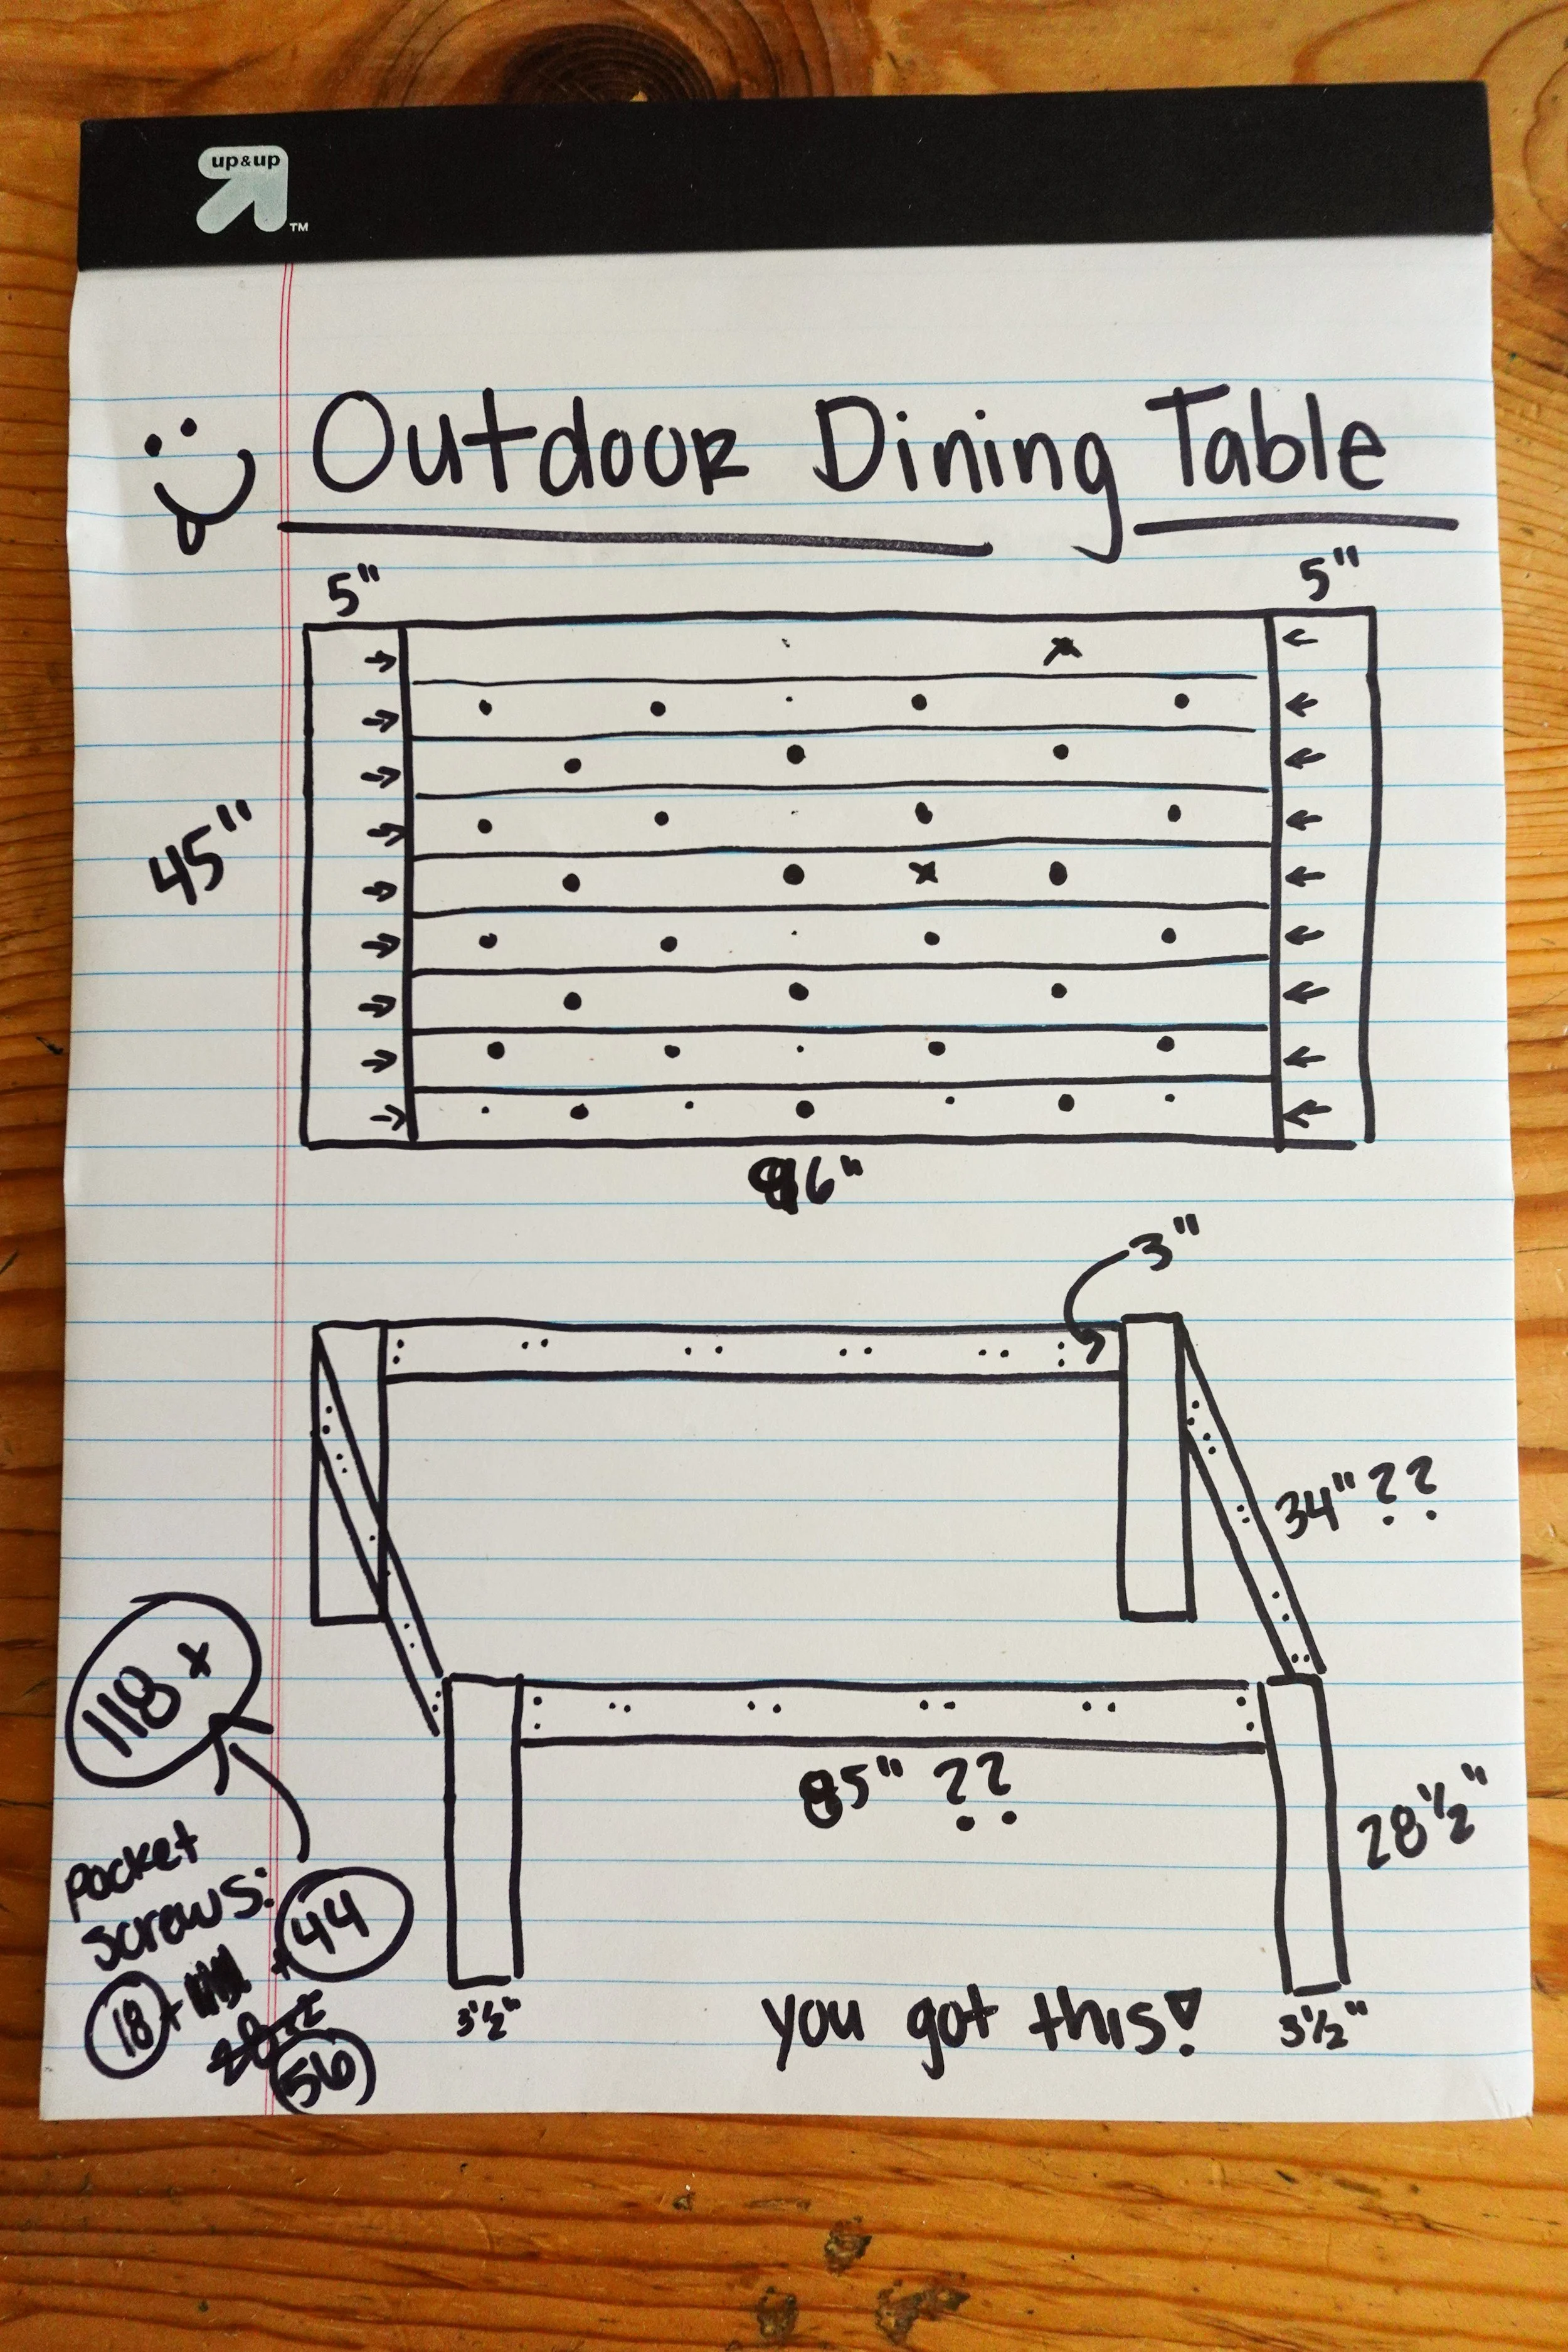
For this table, I went with Douglas Fir because, although a soft wood, it is a little more durable than common pine. If you wanted to do something more budget friendly, you could go with a common pine. Also note that all my measurements are for a table that is 8’ long x 45” wide x 30” tall. You can easily change the measurements to match the size you need.
Step 1: Rip Boards + Cut to Size
You can choose to not rip the boards if you don’t mind the factory finish curve. The only thing to think about is then your table will have a little indent where each of the boards meet, and that might not be ideal when you think of a dining table. I want the boards to be flush together so it’s not only a smooth finish, but easily wipeable after a crazy BBQ meal.
For all the ripping, I am using a table saw and for all the cuts, I am using a miter saw. You could use a circular saw for this, but I would suggest using an accu-cut with it to get it accurate.

Cut List
Table top: rip the (10) 2” × 6” to 5″ wide (Remember that 2 × 6’s are actually only 5 1/2″ wide so you will cut 1/4” off each side to get rid of the factory finish curve). Using (1) of the boards, cut 2 pieces that are 45” long. Cut the remaining (9) boards to 86” long.
Apron & Supports: rip the (5) 2 “× 4” to 3″ wide. (Same as with the 2 x 6’s, 2 x 4’s are only 3 1/2” wide…why they don’t just say 3 1/2” boggles my math brain…or why aren’t they just 4” to begin with?). Cut (2) of the boards to 85 1/2” long for the aprons. Cut (1) of the boards to create 2 pieces that are 34” long for the aprons. Cut the remaining (2) boards to create 4 pieces that are 33 3/4” long for the supports {I recommend waiting until you have the aprons attached to the legs to really get an accurate measurement you will need for the supports. See step 3}.
Table Legs: I chose not to rip the (2) 4” x 4” down to keep the curve. Using the (2) boards, cut 4 pieces that are 28 1/2” long.
To get the table top boards ripped down to the 5” while removing the curves on both sides, start by setting the table saw to 5 1/4” and run it through. Then move the table saw setting to 5” and run through the other side.
Same with the aprons, start at 3 1/4” and then flip the board and do it at 3”. Now you get a nice clean look with boards that will sit flush together.

Step 2: Pocket Holes + Assemble Table Top
You can choose to do the frame first or the table top. I am choosing to do the table top first so I can already have it ready to place the frame on top to secure.

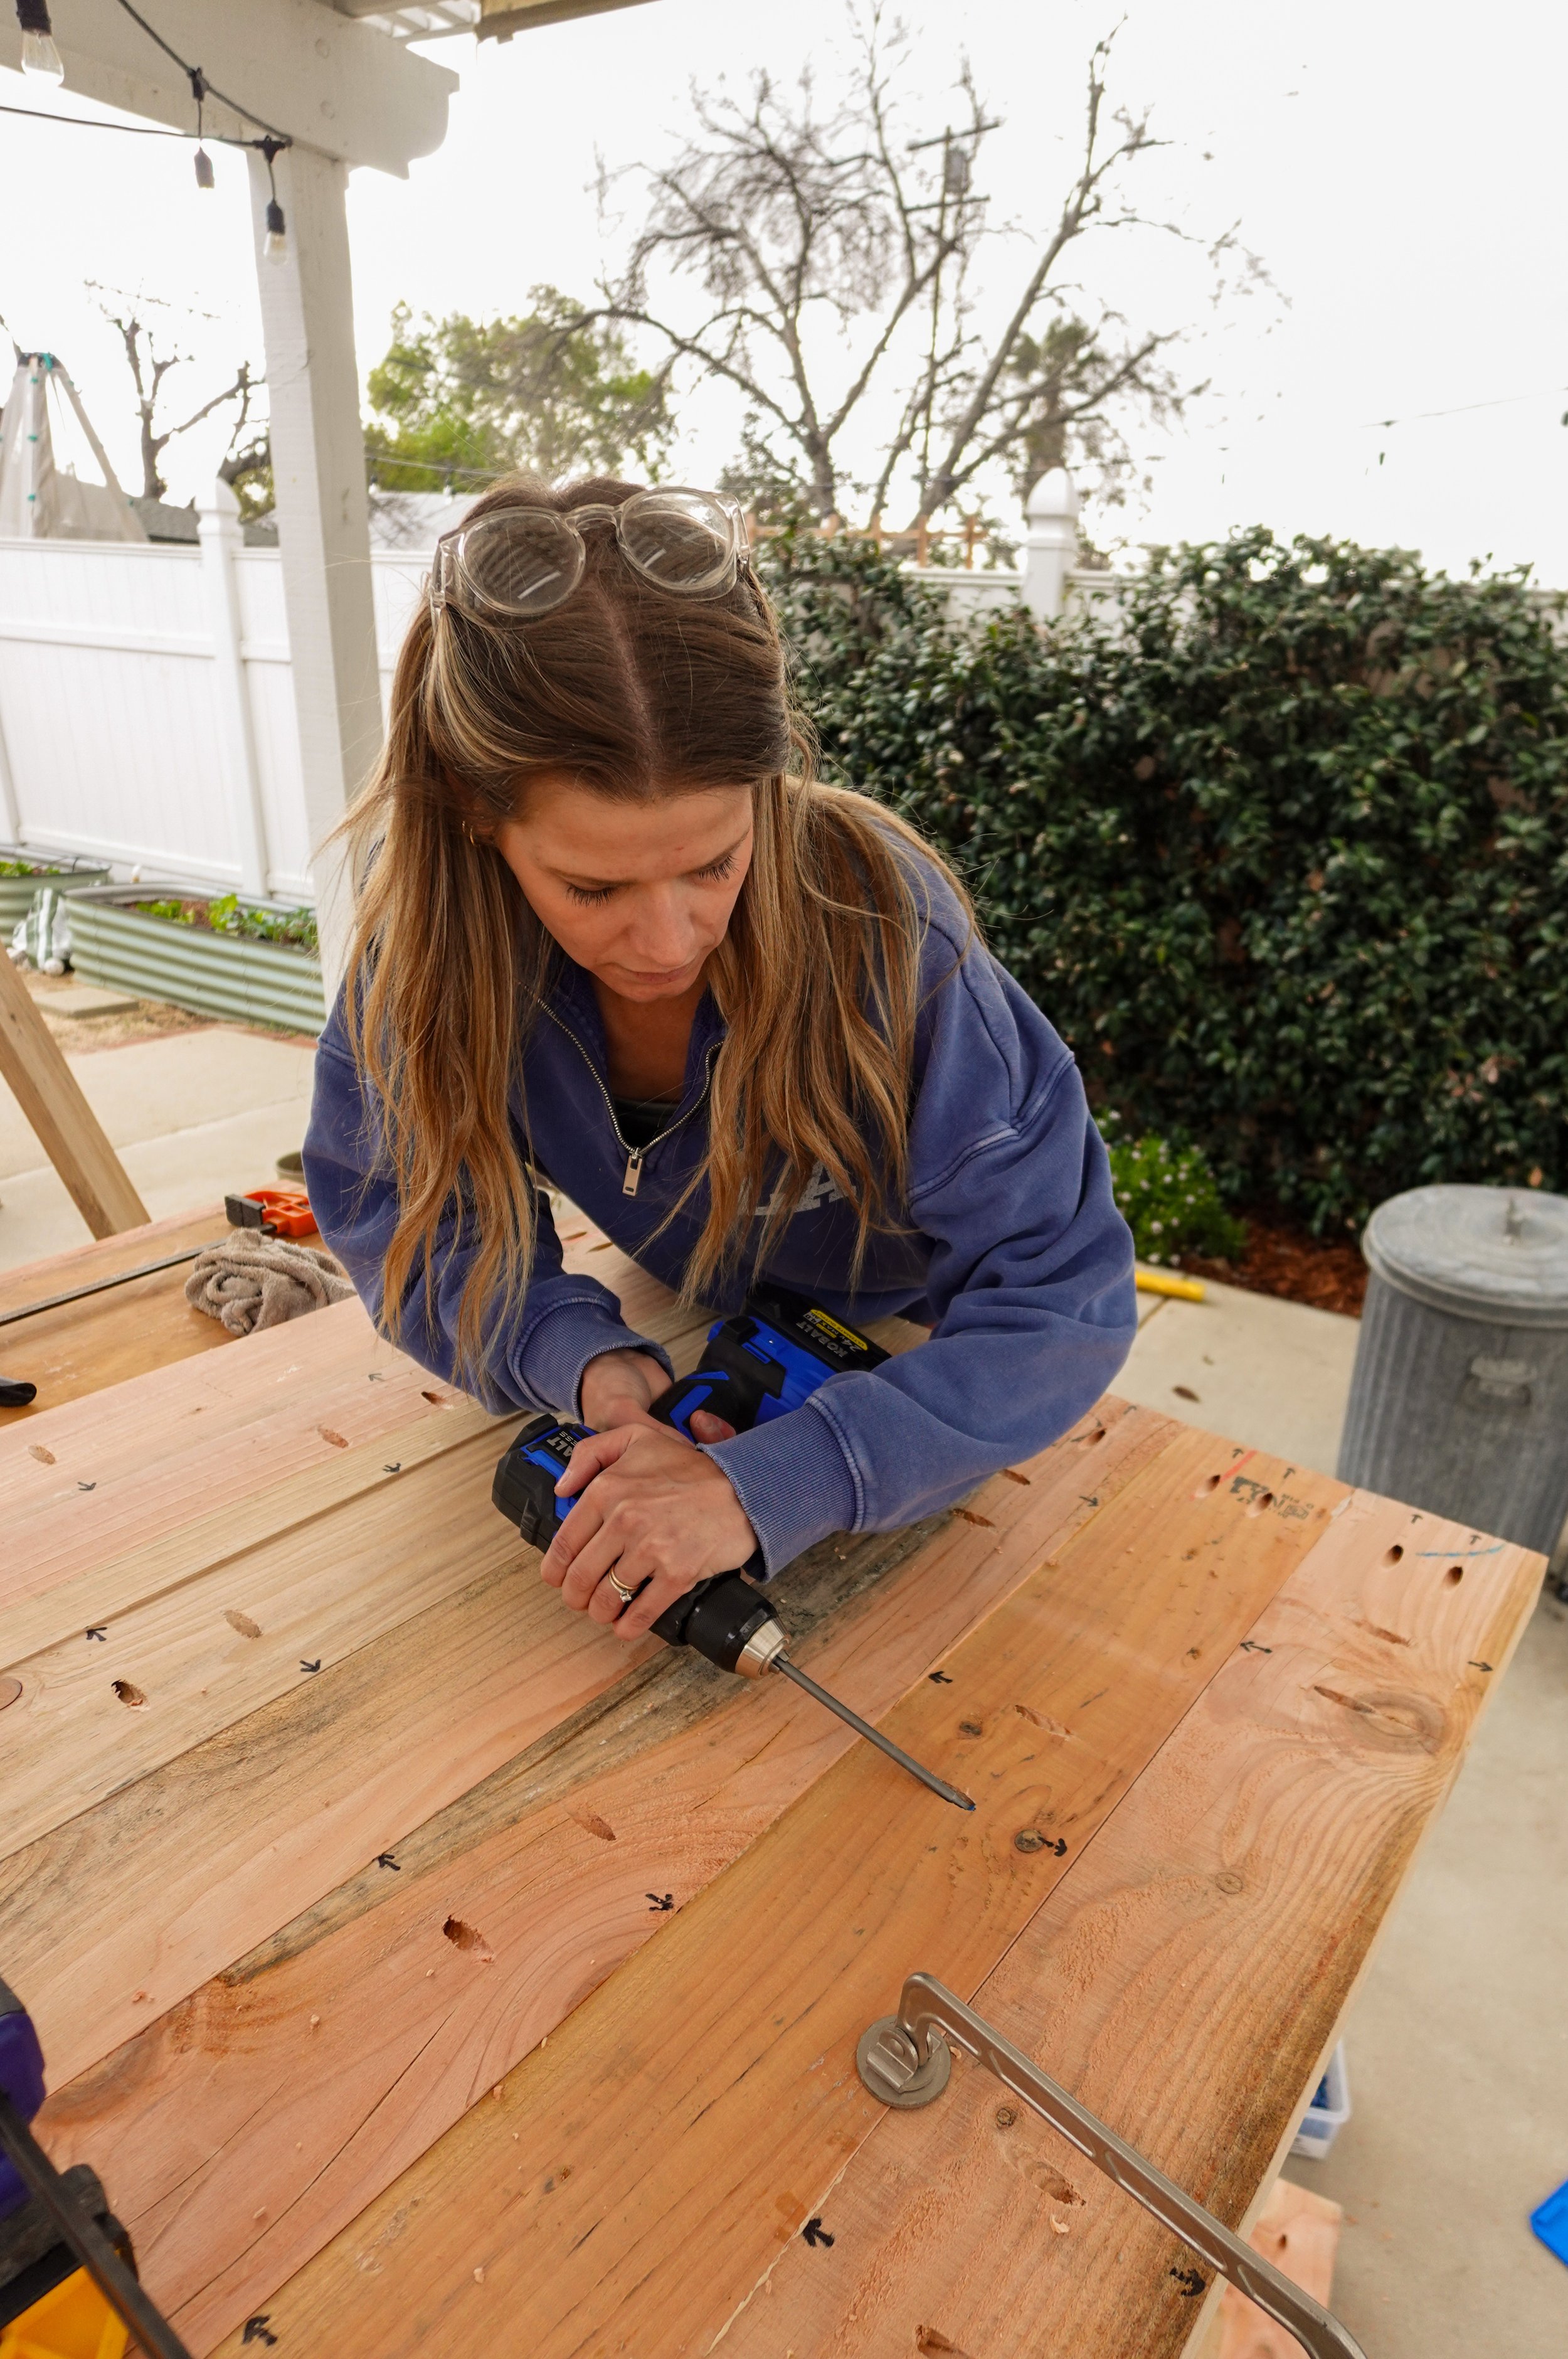
Taking each of the 2 x 6’s (now 2 x 5’s), drill 2 1 1/2” pocket holes on each end of the board facing out (see picture). Then go down the length of the board and drill 1 1/2” pockets all the way. I am alternating sides so that they will go into both boards and will have a pocket hole every 8”. It can get confusing, so I like to draw arrows in the direction that the screw will go so that I don’t get confused when I am in the groove of making the pocket holes (see picture…it makes so much more sense).


This Kreg jig makes the pocket holes go a lot quicker, but it is a more expensive option. Here is another option that is more budget friendly and perfect if you are just starting out.

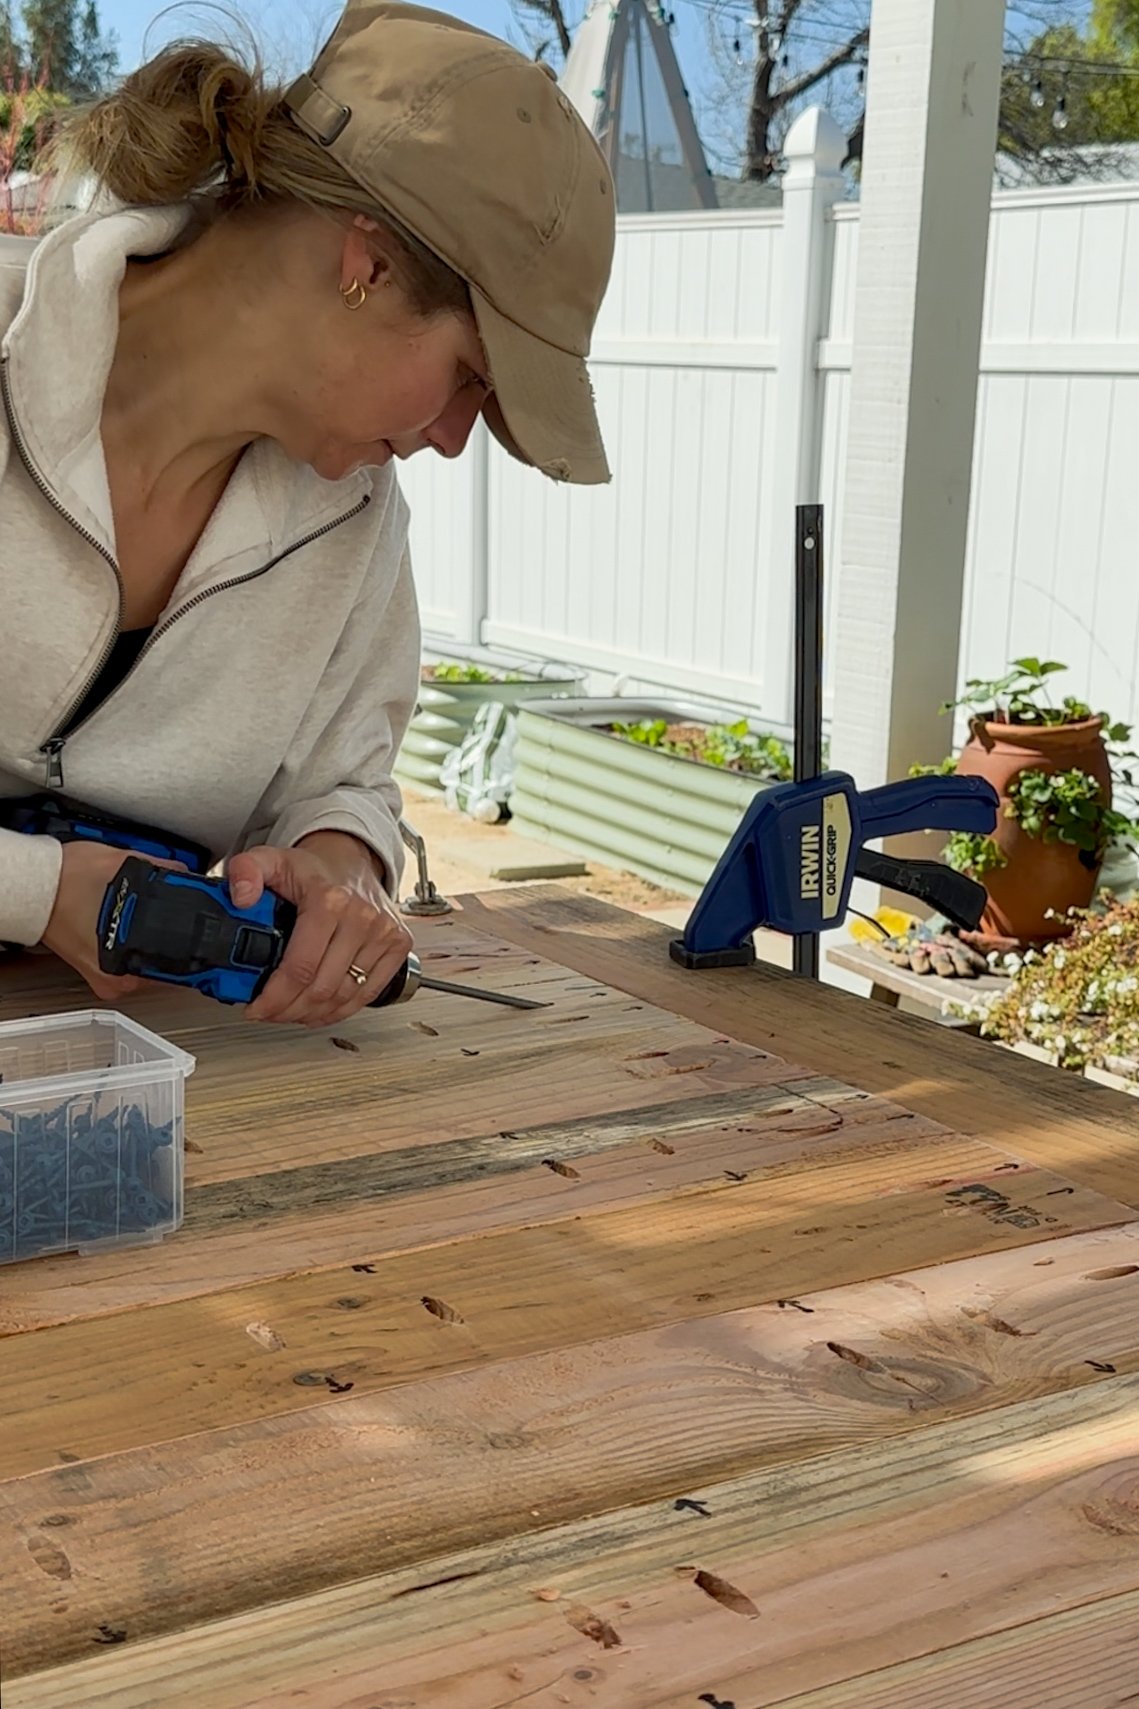
Once all the pocket holes are done, to secure the boards together, use wood glue in between each board and clamp together. Then secure with the pocket hole screws. After the 9 boards are secured together, take the 2 45” inch boards and attach at each end of the table. Figuring out the best way to clamp things down can be challenging, especially if you don’t have the correct clamp or want to spend more $$. I find it best to clamp the table and the end piece individually down to the workbench and then secure using the pocket hole screws.
Step 3: More Pocket Holes + Assemble the Frame
Now that the table top is built, it’s time to get the base ready. Taking the 4 2 x 4’s (now 2 x 3’s), drill 2 1 1/2” pocket holes on each end of the board facing out (these are what will secure it to the legs). Then drill 1 1/2” pocket holes down the length of the boards. I am doing them about every 8”. You want to make sure you do them on the inside of the apron so that you won’t see them and to do them in the direction that will secure to the table top.

Once all the aprons have the pocket holes, it is time to secure them to the legs. Using a flat surface (you want all these to be flush for the table top), secure the aprons to the legs using 2 1/2” pocket holes screws. *I don’t have a picture of the pocket holes in the aprons, but see below for one that is finished after the supports are in.

Now that the outer frame is built, measure the distance between the 2 longer aprons and use the remaining 2 x 4’s to cut your supports to length. Drill 2 1 1/2” pocket holes on each end of the board facing out (these are what will secure to the aprons). I am also adding some pocket holes along the length to secure to the table top (optional).

Once the pocket holes are done, secure the supports to the the aprons and you are ready to attach it to the table top! Here is a better view of the pocket holes underneath the table.

Step 4: Attach Frame to Table Top
Place the frame upside down on top of the upside down table top and secure the frame using wood glue and 2 1/2” pocket hole screws. You could also already flip the frame right side up and place the table on top, then screw from underneath (this will prevent you from having to turn over a very heavy table.)

Step 5: Sand + Finish
Sand away! And don’t skip it. When you get to this part, you want to be done {that is how it is for me, at least}, but take time to sand it properly.

I use a circular sander and start with 80 grit, and then work my way through 120 grit, 150 grit and finishing with 220 grit to get the nice smooth finish without any sanding marks. I spend the most time with the 80 grit to get away any inconsistency’s.
After finishing off with 220 grit, give it a good wipe down (or 2) to get rid of all the dust. Then it is time to finish it off. I am using this one coat stain and sealer from Valspar in clear, but the options for this step are endless.


That is it. Now it is time to enjoy all the meals with all the people. Oh, chairs! I went on a long hunt for the perfect chair to match my vision, but I couldn’t find what I was wanting with the perfect cottage vibe within my budget. Then I found these awesome chairs that, although aren’t the original style I was going for, are so budget friendly and will hold up outside. Can’t pass that up!

I hope this has been helpful for you. If you have any questions or comments, let me know below. And if you make your own table, send a pic my way! Until next week, my friend. Make it a great one!
with love, andi
Want to save this for later? Save to your favorite Pinterest board!