How to Make Rainbow Wall Art Using a Drop Cloth
/Over a year ago, we built bunkbeds for our girls. It was a huge undertaking and awesome accomplishment. We finished just in time for the girls to move in before Asher was born. And then we didn’t do anything else to the rest of the room. A year later and I am back at it in their room, finishing up the rest of the space.

A non negotiable for both girls is that it must have rainbows…they love the rainbows. And Sawyer, being on the bottom bunk, doesn’t get to enjoy the rainbow I painted on the top bunk. So we are changing that {more on that later}.
For now, I am moving the rainbow to a different wall. And instead of simply painting a rainbow on the wall, I want it to be a statement piece. And this is where the extra large canvas comes to life.

The great thing about this project is: it can be made to any size you want, the possibilities of artwork are endless, and it saves money.
Materials:
1x2 whitewood or pine
5mm plywood cut to size of frame
Paint of choice (I got a bunch of the sample size - keep reading for the specific colors I used)
Tools:
Jigsaw or Table Saw
*These links contain affiliate links. Meaning if you purchase through my link, while it’s the same cost to you, I get a small commission – see my full disclosure here*
My favorite thing is that it is one of a kind
Step 1: Build Frame
First thing’s first, build the frame! Use the miter saw to cut your 1x2’s to the size you need. Mine is going to be pretty large at 4’x5’. I am adding another frame piece down the middle. Attach pieces using wood glue and a brad nailer.

Next, cut 4 pieces at 45 degrees for the 4 corners and attach to help make it extra secure.

Step 2: Attach Plywood
This next step was not in my original plan. My hope was to be able to wrap the drop cloth around my frame, similar to how a canvas is. However, when I attempted to attach the drop cloth, I could tell it needed more support. This absolutely could be because of the size I am doing or because of the material of the drop cloth.
So now, I am adding a piece of primed/painted white {when you stretch the drop cloth, the plywood peaks through a bit} 5mm underlayment plywood cut to the size of my frame using a jigsaw. To attach it to the frame, use wood glue and then secure it with brad nails.

Step 3: Attach Drop Cloth
This is where things get exciting. To attach the drop cloth, stretch it around your frame and use a staple gun to secure it to the back of your frame.

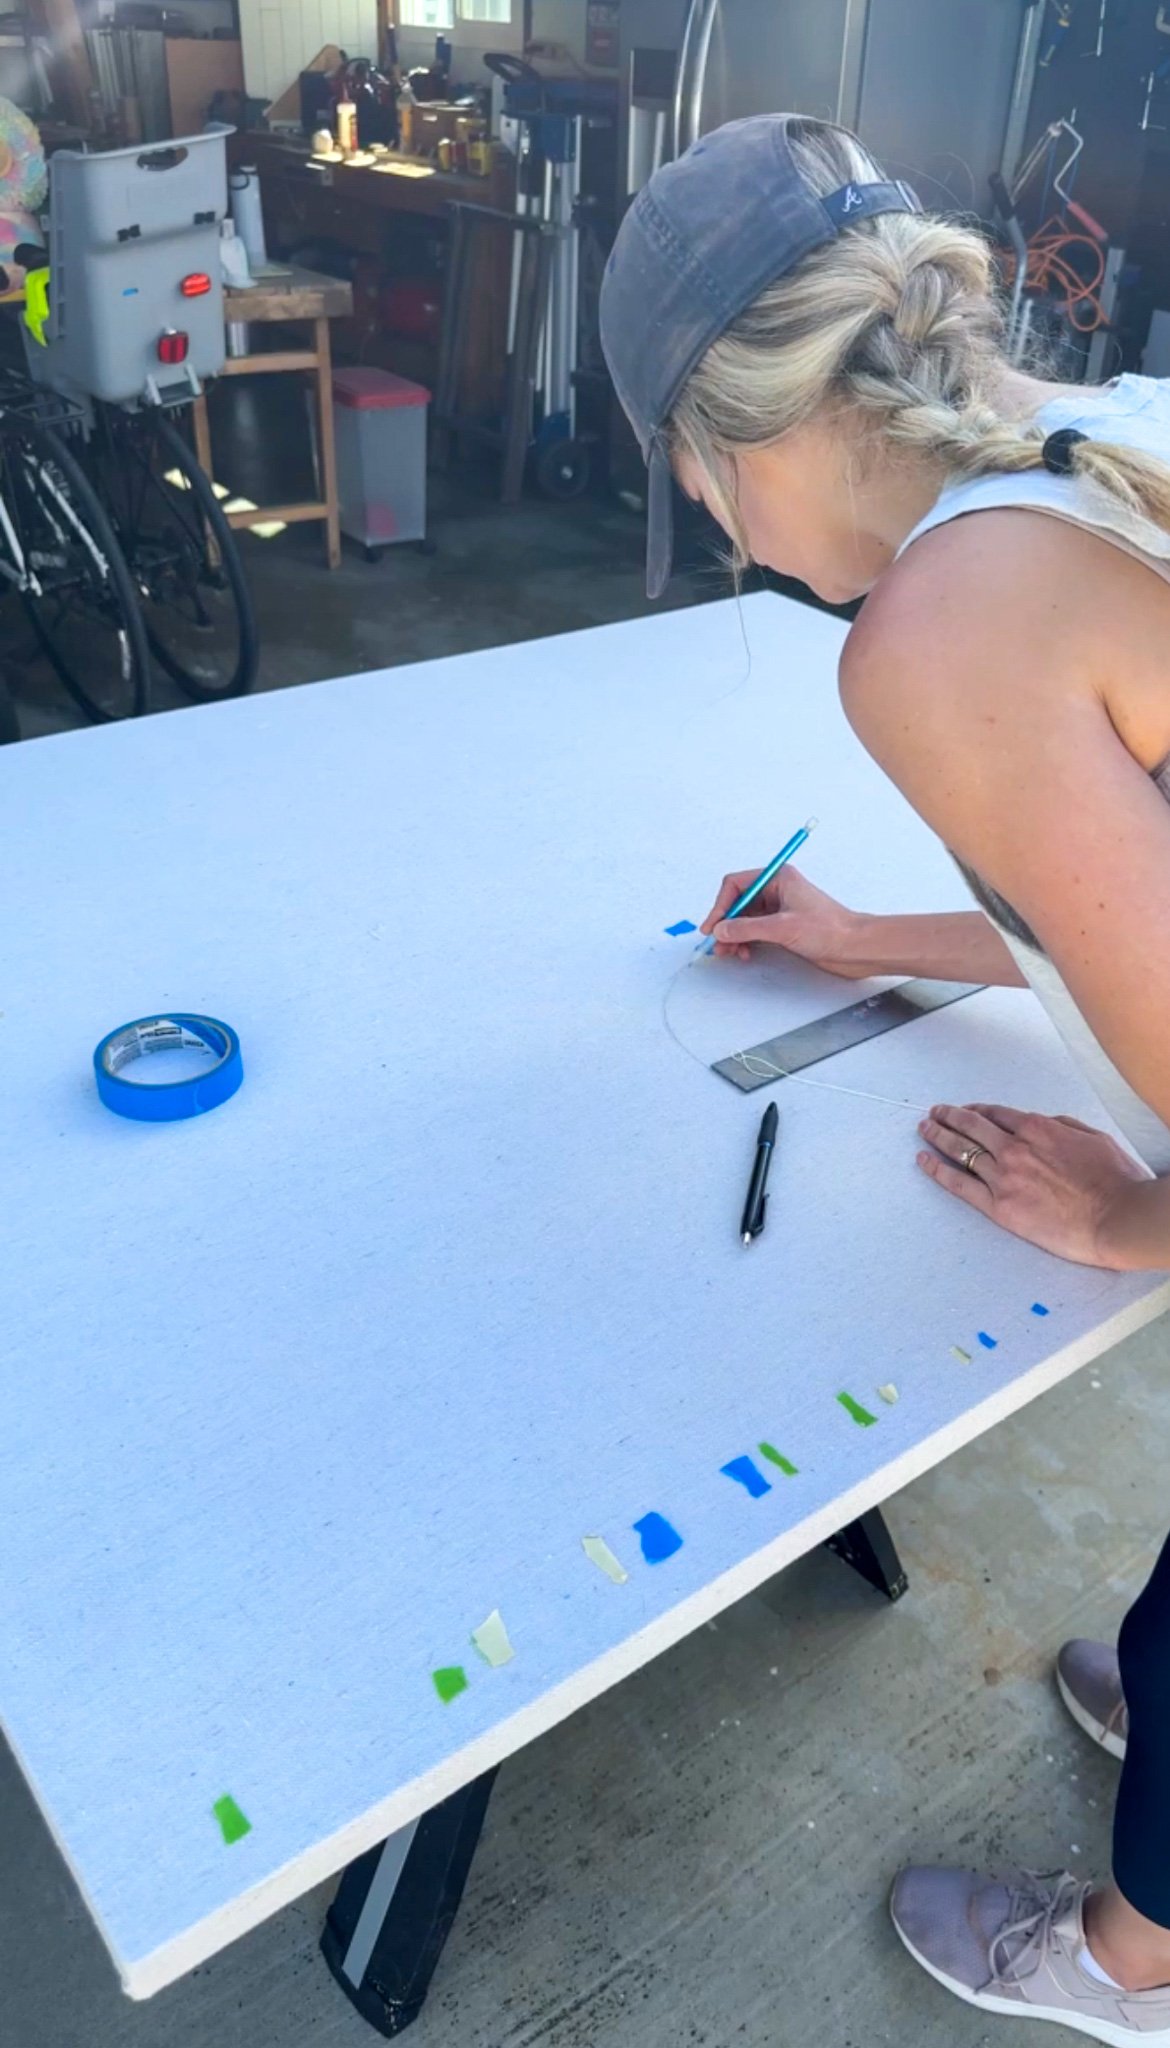
Step 4: Draw out Rainbow {or art of choice}
This next step is not absolutely necessary, all dependent on your level of artisiticness. My free hand artistic ability is at a -10, so I am drawing out the first arc of the rainbow lightly with a pencil. Before that, I am double and triple checking the size of my arches using tape to mark their width because once you paint on the drop cloth, there ain’t no way you are getting it off 😅
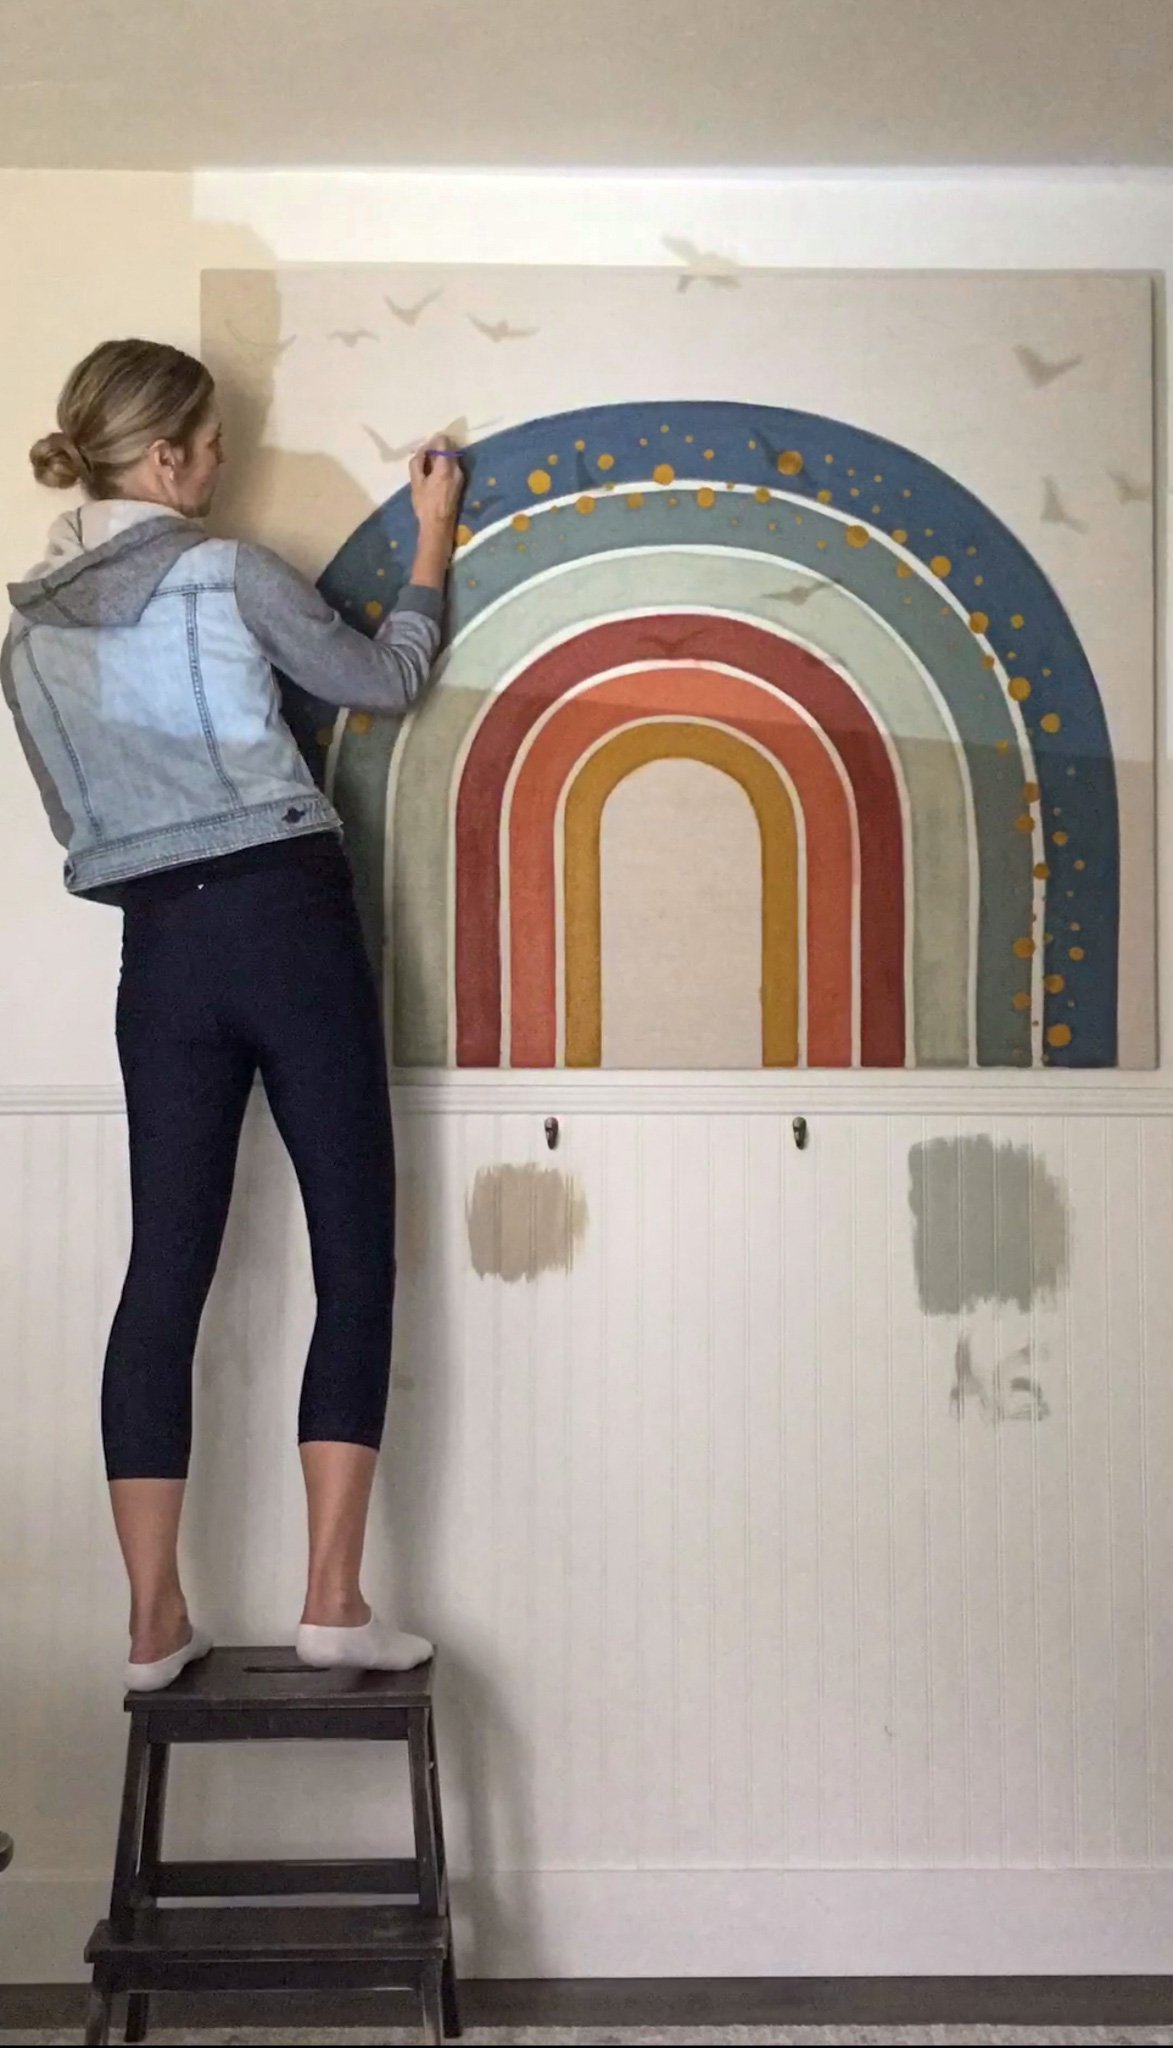
Step 5: Paint Artwork
Where things come to life! The final step is to paint your artwork. But be careful, you might get overconfident and paint the wrong color on the rainbow and have to go back and fix it all.


After the rainbow is finished, I am adding in some extra fun detail with dots and birds.
Once it is all done, attach D Rings to the back of your frame, hang up and enjoy!

Rainbow Colors (All Sherwin Williams):
Cut the Mustard, Robust Orange, Fired Brick, Coastal Plain, Retreat, Bunglehouse Blue


That is all there is to it! I am thinking of adding a wood frame on the surround to give it more of an art piece type of look…what do you think?